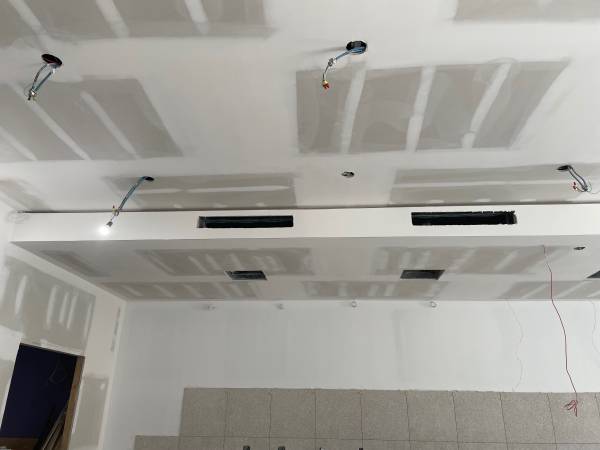
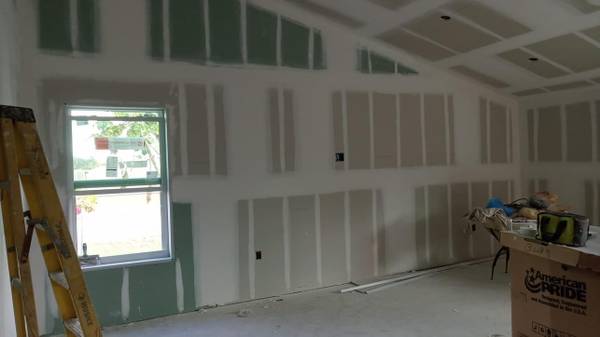
Drywall Taping Professional Techniques

Preparation for Drywall Taping
When it comes to achieving a flawless and long-lasting drywall finish, proper preparation is absolutely crucial. Before you even think about picking up a roll of tape or a tub of joint compound, ensuring that your drywall surface is clean, smooth, and free of any imperfections is paramount. Any bumps, dents, or rough patches left unaddressed will only be magnified once the taping and mudding process begins. Taking the time to inspect your drywall thoroughly and address any issues that may compromise the integrity of your finished project will set the foundation for professional-quality results.
Not only does proper drywall preparation contribute to the aesthetic appeal of your project, but it also plays a significant role in its longevity and durability. By meticulously preparing your drywall surfaces before taping, mudding, and painting, you are creating a solid base that will resist cracks, peeling, and other common issues that can plague poorly executed drywall projects. Investing time and effort into this initial stage of the process will pay off dividends in the form of a smooth, seamless finish that will stand the test of time.
Different Types of Drywall Tape
When it comes to drywall taping, selecting the right type of tape is crucial for achieving a seamless finish. The most common types of drywall tape are paper tape, mesh tape, and fiberglass tape. Paper tape is preferred for its affordability and compatibility with all-purpose joint compound, while mesh tape is known for its high strength and self-adhesive properties. Fiberglass tape, on the other hand, is ideal for preventing cracks and is commonly used in high-stress areas. Each type of tape offers unique benefits, so it’s essential to choose the one that best suits your project requirements.
While paper tape is a traditional choice, mesh tape has gained popularity due to its ease of use and durability. Mesh tape is particularly recommended for beginners as it is less prone to tearing and provides a smoother finish. Fiberglass tape, although slightly more expensive, offers superior strength and is perfect for reinforcing corners and edges. Ultimately, the type of drywall tape you select will depend on factors such as project complexity, budget, and personal preference. By understanding the characteristics of each type of tape, you can make an informed decision that will help you achieve professional results in your drywall taping project.
Right Tools for Drywall Taping
When it comes to achieving a seamless and professional finish in your drywall taping project, selecting the right tools is paramount. One of the essential tools for any drywall taping job is a quality taping knife. Opt for a stainless steel blade with a comfortable handle that allows for precise control and smooth application of joint compound. Additionally, having a variety of taping knives in different widths will enable you to tackle a range of joint sizes efficiently.
A drywall banjo or mud applicator is another indispensable tool for speeding up the taping process. This tool allows you to apply joint compound and tape in one smooth motion, saving time and ensuring even coverage. Additionally, a corner roller is essential for embedding tape into inside corners seamlessly. Invest in high-quality tools that are durable and ergonomic, as they will not only make your job more efficient but also result in a professional-looking finish.
Smooth and Seamless Joints
To achieve smooth and seamless drywall finishing, it is essential to apply the right amount of joint compound. Begin by loading your taping knife with an adequate amount of mud, ensuring even distribution along the joint. Using firm but controlled pressure, spread the compound over the joint in smooth, consistent strokes. Be mindful of air bubbles and excess mud, as they can result in uneven surfaces that require additional sanding and refinement.
Once the joint compound is applied, carefully smooth out any ridges or imperfections with a clean, dry taping knife. The goal is to create a flat and uniform surface that seamlessly blends with the surrounding drywall. Take your time to ensure the mudded joints are perfectly aligned and free of any visible seams or bumps. This meticulous attention to detail during the mudding process is crucial for achieving professional-looking results in your drywall project.

Applying Drywall Tape with Precision
To achieve professional results when applying drywall tape with precision, it is crucial to start by ensuring that the surface is clean, dry, and free of any debris. Any imperfections on the drywall should be addressed beforehand to promote optimal adhesion of the tape. Additionally, properly measuring and cutting the tape to the appropriate length for each joint is essential for a seamless finish. Carefully position the tape along the joints, ensuring a snug fit without stretching or overlapping.
After positioning the tape, use a high-quality joint compound to embed and cover the tape smoothly. Work in small sections at a time, pressing the compound firmly into the joints while feathering the edges to create a seamless transition. Avoid applying too much pressure, as this may cause the tape to wrinkle or shift. Once the tape is covered with the joint compound, allow it to dry completely before sanding to achieve a smooth and even finish. Remember, precision and attention to detail are key to mastering the art of applying drywall tape effectively.
Common Mistakes to Avoid When Taping Drywall
One common mistake to avoid when taping drywall is neglecting to properly prepare the surface before applying the tape. Failing to remove dust, debris, or uneven patches can result in poor adhesion and a less professional finish. It is essential to thoroughly clean and smooth the area to ensure the tape adheres seamlessly, preventing any future cracking or peeling.
Another critical error to steer clear of is applying too much or too little joint compound when embedding the tape. If too much compound is used, it can lead to bulging or visible seams that are challenging to fix. Conversely, too little compound may not provide adequate coverage and support for the tape, resulting in weak joints that are prone to cracking. Finding the right balance and applying the correct amount of joint compound is key to achieving a flawless and durable finish in your drywall taping project.
Professional Results with Drywall Taping
To achieve professional results with drywall taping, meticulous attention to detail is key. Begin by ensuring the drywall surface is clean, smooth, and free from any debris. Properly position the drywall tape along the joints, applying just enough pressure to embed it into the joint compound without causing it to wrinkle or buckle. Use a taping knife to carefully smooth out the tape, ensuring it is firmly adhered to the drywall. Allow each layer of joint compound to dry completely before proceeding to the next step.
Next, focus on creating seamless joints by feathering out the joint compound smoothly and evenly. A thin layer of compound applied over the tape followed by wider layers feathered out beyond the edges will help achieve a seamless finish. Use a sanding block to gently smooth out any imperfections between layers, being careful not to oversand and risk damaging the tape or drywall surface. With patience and precision, professional results can be achieved through proper taping techniques and attention to detail.
Sanding for a Flawless Finish
Sandpaper is an essential tool in the drywall taping process, playing a crucial role in achieving a flawless finish. After applying joint compound and allowing it to dry, sanding is necessary to smooth out any rough edges, bumps, or imperfections. This step not only creates a seamless surface but also ensures that the taped joints blend seamlessly into the surrounding drywall, creating a professional-grade result.
Professional drywall tapers understand the importance of meticulous sanding to achieve a flawless finish. Using fine-grit sandpaper and employing consistent, even strokes is key to avoid over-sanding and causing damage to the underlying layers of joint compound. Additionally, paying attention to detail during the sanding process is essential for achieving a smooth and even surface that is ready for priming and painting.
Issues with Drywall Taping
When encountering issues with drywall taping, it is crucial to address them promptly to ensure a seamless finish. One common problem that arises is air bubbles forming beneath the tape during the drying process. To resolve this issue, carefully peel back the tape, smooth out the area, and reapply the tape with even pressure. Additionally, if you notice tape edges lifting or peeling, use a high-quality adhesive to secure them back in place before proceeding with mudding and sanding.
Uneven or rough joint lines can also pose a challenge when taping drywall. To rectify this, ensure that you feather out the joint compound evenly on both sides of the seam and sand meticulously between coats to achieve a smooth transition. If ridges or bulges persist after sanding, applying additional thin layers of joint compound and feathering them out gradually can help blend the imperfections for a flawless finish.
Incorporating Texture into Your Drywall Taping Project
To add an extra dimension to your drywall taping project, consider incorporating textures that can elevate the aesthetic appeal of the finished surface. Texturing can help disguise imperfections and provide a unique visual interest to your walls or ceilings. There are various texturing techniques available, such as stippling, sand swirls, knockdown, and orange peel. Each technique offers a distinct look and feel, allowing you to customize the appearance of your taping project to suit your preferences. Experimenting with different textures can transform a plain drywall surface into a dynamic focal point within your space.
When incorporating texture into your drywall taping project, it is essential to prepare the surface adequately beforehand. Smooth out any bumps or ridges, and ensure that the drywall compound is completely dry before applying the texture. Additionally, consider using specialized tools like texture sprayers, brushes, or rollers to achieve the desired effect effectively. Take your time to practice the texturing technique on a sample board before applying it to the actual surface to ensure a consistent and professional finish. By paying attention to detail and mastering the art of texture application, you can create a visually stunning and unique space that reflects your personal style.
Techniques for Corners and Angles
When it comes to achieving professional results with drywall taping, mastering the techniques for corners and angles is crucial. Corners and angles are areas that require precision and skill to ensure a seamless finish. To tackle corners effectively, it is essential to use paper or fiberglass mesh tape that can easily conform to the sharp angles. Applying joint compound evenly and feathering it outwards can help in creating smooth transitions at corners. Additionally, using a corner trowel or mud applicator specifically designed for corners can aid in achieving clean and sharp edges.
Angles present a unique challenge in drywall taping, requiring attention to detail and patience. Properly taping angles involves applying a thin layer of joint compound along the angle and embedding tape carefully to prevent bubbles or wrinkles. Feathering out the mud on both sides of the angle gradually can help in creating a seamless finish. Using a corner roller or hand sanding block can assist in smoothing out any imperfections and achieving a professional result. By mastering the techniques for corners and angles, you can elevate the overall quality of your drywall taping project.
Sealing and Priming Taped Drywall
Proper sealing and priming of taped drywall is a crucial step in the process of achieving a flawless and long-lasting finish. Without adequate sealing and priming, the drywall surface may not be properly prepared for the application of paint, leading to issues such as uneven color absorption, poor adhesion, and a lackluster final appearance. By taking the time to seal and prime the taped drywall correctly, you are setting the foundation for a professional and durable result that will stand the test of time.
Sealing the taped drywall helps to prevent the absorption of moisture, which can cause the drywall to swell or develop mold over time. Priming, on the other hand, creates a uniform surface that allows the paint to adhere evenly and provides a smooth finish. Additionally, priming helps to seal the taped joints, reducing the visibility of seams and creating a seamless look once the paint is applied. Investing in proper sealing and priming of taped drywall is a small but significant step that can make a big difference in the overall quality and longevity of your drywall project.
Durability and Longevity with Proper Taping Techniques
To ensure your drywall taping stands the test of time, it is imperative to adhere to proper techniques that enhance durability and longevity. One key aspect to focus on is the thorough embedding of the tape into the joint compound to prevent future cracks or separations. When the tape is securely embedded and the excess mud is properly removed, it creates a solid bond that reinforces the structural integrity of the seams. This meticulous attention to detail during the taping process not only guarantees a smoother finish but also contributes to the overall strength and longevity of the wall or ceiling.
In addition to embedding the tape effectively, another crucial factor in enhancing the durability of your drywall taping is the proper application of multiple thin layers of joint compound. Thin layers not only allow for easier feathering and blending but also reduce the risk of cracking as the compound dries. Building up the compound gradually ensures that the joints remain strong and resistant to impacts or structural shifts over time. By meticulously applying and feathering each layer, you establish a solid foundation that reinforces the taped seams and significantly prolongs the lifespan of your drywall installation.
Painting Over Taped Drywall
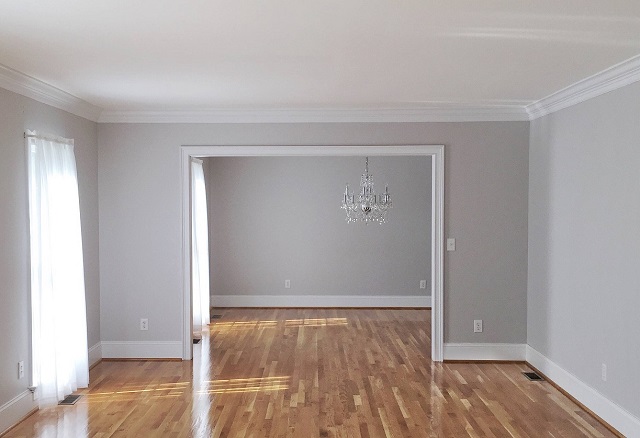
When it comes to painting over taped drywall, proper preparation is key to achieving a flawless finish. Before you begin painting, ensure that the taped joints are smooth and free of any imperfections. Sand down any rough areas and use a high-quality primer to create a smooth surface for the paint to adhere to. This will help ensure an even and professional-looking paint job.
In addition to proper preparation, it is important to choose the right type of paint for your taped drywall. Opt for a high-quality paint that is specifically designed for use on drywall to ensure durability and longevity. Using the right paint will also help to enhance the overall appearance of the finished project. Remember to apply the paint in thin, even layers to avoid drips or streaks, and allow each coat to dry completely before applying the next layer.
Hiring a Drywall Taping Professional
When undertaking a drywall taping project, the precision and finesse required to achieve flawless results cannot be overstated. While some may opt for a DIY approach, the value of hiring a skilled drywall taping professional should not be underestimated. Seasoned professionals bring a wealth of experience and expertise to the table, ensuring that your project is completed efficiently and to the highest standards.
Moreover, skilled professionals have access to specialized tools and materials that can make a significant difference in the outcome of your drywall taping project. Their knowledge of the latest techniques and trends in the industry allows them to tackle any challenges that may arise with confidence and competence. By entrusting your project to a skilled professional, you are not only investing in superior results but also saving yourself time and effort in the long run.


